Creating profiles
This tutorial covers how to define basic and advanced profile shapes when presenting cross sections in GSA-Grasshopper. The methods here can be applied to building structures, roof structures, bridge structures and more.
The key outcomes are:
- Accessing standard section catalogues
- Defining simple cross section shapes
- Accessing and editing section properties
- Defining tapered cross section shapes
- Defining custom cross section shapes
Create a section and get properties
Oasys GSA-Grasshopper: Creating simple profiles
Create a profile
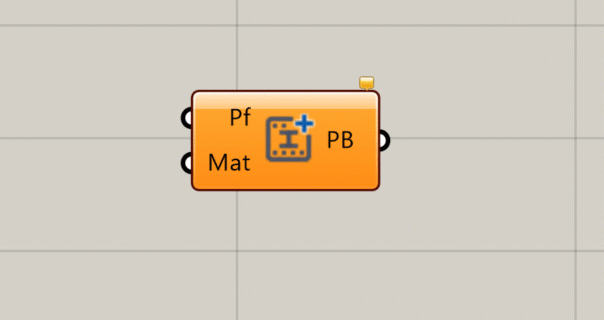
Select Create section  from the Properties tab.
Tip: Hover over the inputs on the left to see the required inputs. For this example, you will need a profile and a material.
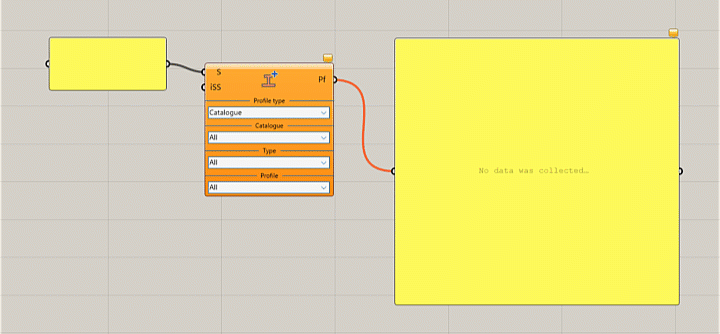
Select Create profile  from the Properties tab.
Select a profile type from the dropdown.
Note: The Catalogue options allow you to access the international catalogue of steel sections from GSA.
Connect the Panel output to view a summary of your profile type in a text window.
To send this information to GSA, select Create model  from the Model tab, and plug-in to the Properties input.
Select Save  from the Model tab, then Open in GSA.
Your profile will now be visible in GSA under Explorer pane > Section library.
Tip: The Section input in the Create profile component can work as a search function with text inputs, giving out a list of matching profiles.
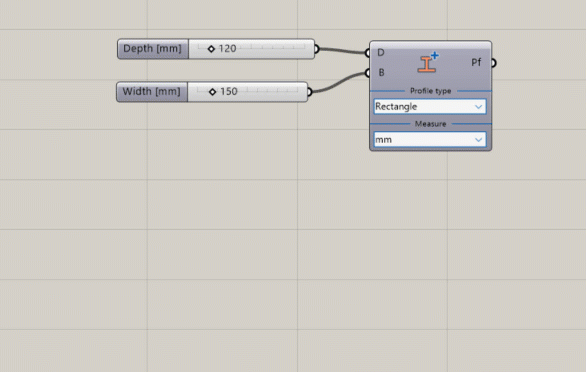
Using a string to edit a profile type
In this example, we have also used the Create profile component to create a rectangular cross section. In this case, the Profile type component tells us that we need to define depth (D) and width (B).
Use a Text panel to create these inputs with a string.
Use profile and section to get section properties
In the Properties tab, select Section properties  .
.
You can directly input a Profile or Section parameter here.
Use a Panel to view the list of outputs from the Section properties component.
Tip: Right click in the centre of the Section properties component to change the unit output.
You can also select Section dimensions  from the Properties tab.
Input your profile and use a Panel to view your list of outputs.
Taper perimeter profiles
Oasys GSA-Grasshopper: Creating tapered and perimeter profiles
Using the taper profile component in GSA-Grasshopper
Grasshopper allows you to create table profiles for two profiles of the same type.
In the Properties tab select Create profile component .
Tip: Left click and drag to draw a square around the components you want to copy and paste. Hover over one of the selected components and left click, hold Alt, and pull to copy the components.
Once you have set up your profile components. Select Taper profile  from the Properties tab.
- In this example we have input a 1D element, via the Create new 1D element
 component and a line.
Click Create model from the Model tab. Save then Open in GSA.
Creating a more complex profile
Start by copying your existing profile type.
In this example we will create a perimeter profile:
- Add a rectangle with the Rectangle component, and use numeric sliders to adjust the input sizes.
- Use the Area component to get the centre point of the rectangle. Create a circle with this centre point using the Circle component. Set the radius of the circle appropriately with a numeric slider input.
- Use the Boundary surfaces component with the rectangle and circle plugged into the edge curves input of the component. This makes a rectangle with a circular cut-out.
The steps above create a brep which shows a representation of the profile, but cannot be used with the Create profile component in GSA-Grasshopper, as it accepts only Polyline inputs. We can create this polyline as follows:
- Select the Divide curve component and connect the circle to the curve input. Use the numeric slider inputs to set the number of division points.
- Use the Polyline component with the points from the Divide curve component as input vertices to create a Polyline.
- Replace the circle input to the Boundary surfaces component with the polyline from the previous step. Flatten all inputs for this component.
- Plug in the surface into the Create profile component to create the profile.
Tip: To check your polyline is closed, use the Boolean toggle component set to true, and plug it into the Is closed input of the Polyline component.