An example: Importing a GSA model into Revit
This How-To Guide contains a step by step instructions on importing a GSA model into Revit using the GsRevit Import from Oasys GSA tool as well as explains what to do when certain error messages are encountered.
Note: The procedure followed for importing this model is specific to the example and the approach can differ depending on the model used.
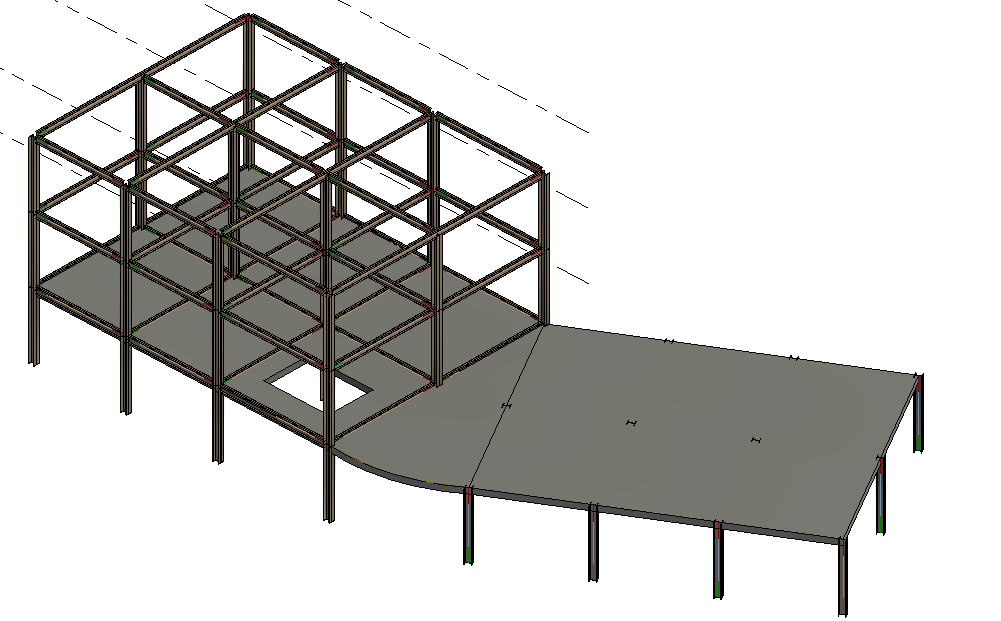
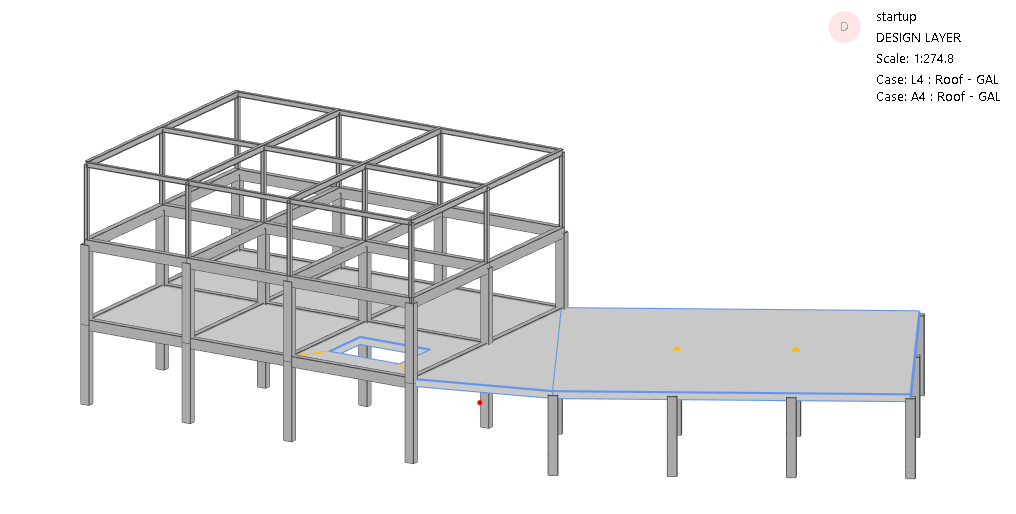
The model used in this tutorial, "TrGen_10.gwb" can be found in the GSA Sample Files repository on github.
Check GSA model
Open GSA.
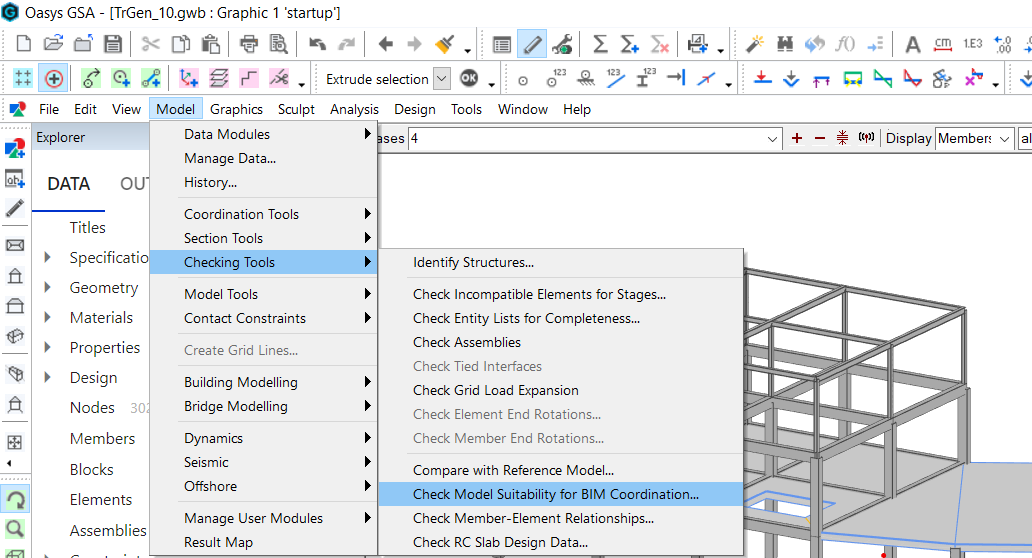
In the top menu go to Model > Checking tools > Check model suitability for BIM coordination
GSA will produce the following output in the Report pane after running the check:
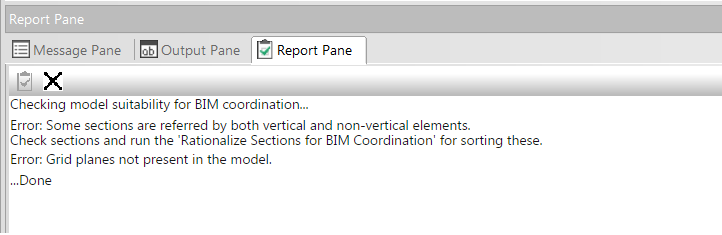
Error: 'Members are not present in this model'
If you see the message above, go to Model > Coordination tools > Create members from elements to automatically generate members.
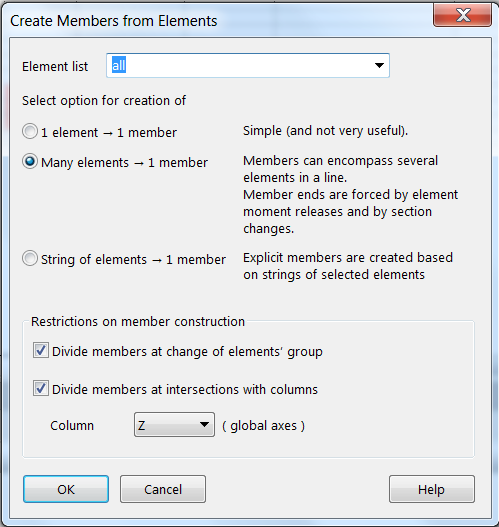
Note: If the automatic tool does not split members at the correct locations, try changing the elements list and column direction options in tandem. Alternatively, you can also use the Sculpt options to create members manually wherever needed.
Error: 'Some sections are referred by both vertical and non-vertical elements'
GSA Sections that are referred to by vertical and non-vertical members cannot be imported. However, vertical and slanted column can refer to the same GSA section. Go to Tools > BIM utilities > Rationalise sections for BIM Coordination to correct these.
Error: 'Check grid plane definitions and ensure they represent structure levels.'
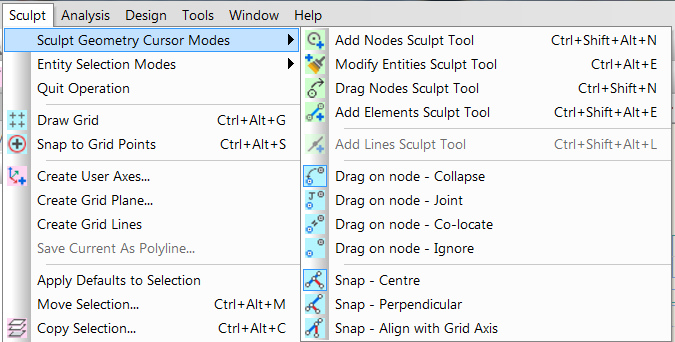
Grid plane elevations in a GSA model should represent level elevations. To graphically iterate through the grid planes in the model, first turn on the grid display by going to Sculpt > Draw Grid. Alternatively, select the Draw grid icon from the toolbar  then switch to Current grid in the Display drop down in the graphics view.
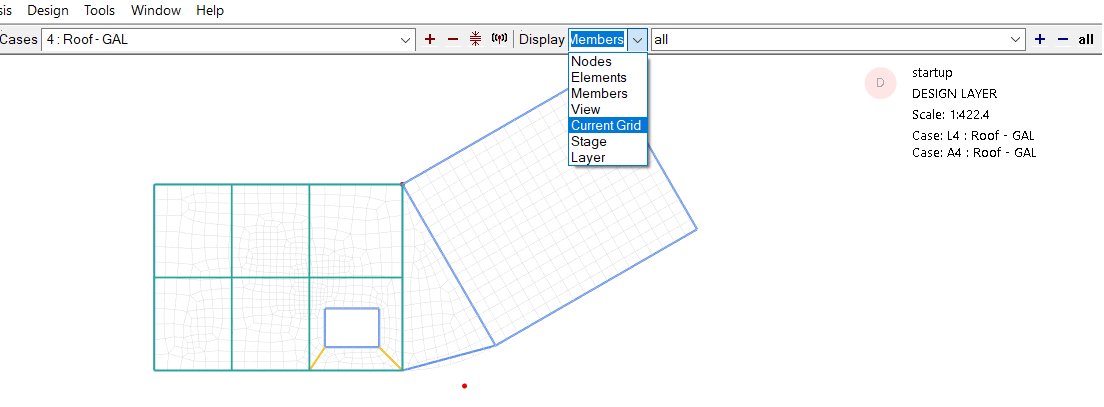
You can now loop through all grid planes in the model by using the Plus and Minus buttons to the top of the graphic window ![]() .
.
Creating new grid planes
- Click on the Select node icon in the toolbar:

Select 3 nodes lying on the proposed plane.
Go to Sculpt > Create grid plane to create a grid plane if one doesn’t exist. See the Creating grid planes graphically References entry for more information.
Section mapping
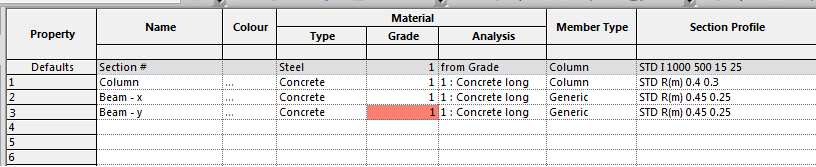
The section property table contains cross sections of members used in the model. These need to be mapped to Revit Families. This can be done in two ways:
By editing the ‘Mappings.db3’ file using a third party tool like SqLite or DB Browser
Editing the mapping table in the Mapping section wizard.
Mapping section wizard
Open ‘Mappings.db3’ from <C:\Program Files\Oasys\GSA 10.2\mappings.db3> in SqLite personal (http://www.sqliteexpert.com/) and ensure all entries in the section property table are present in the Framing or Columns table, as relevant:
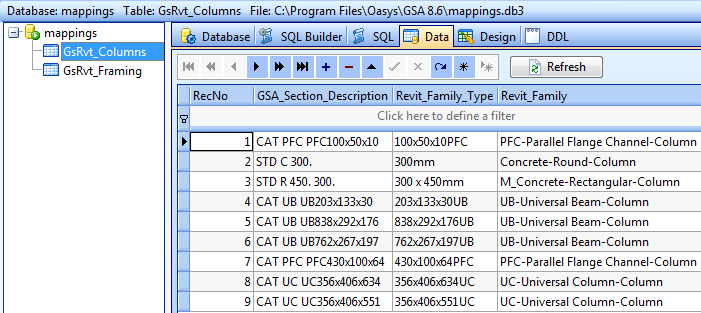
If you modify the mappings.db3 file, make sure to save it in a different location; reinstalling GSA will overwrite this file. The path to your version of mappings.db3 can be set in GSA by going to Tools > Preferences > Basic > File locations > Mappings database file.
Save and close the mappings.db3 file.
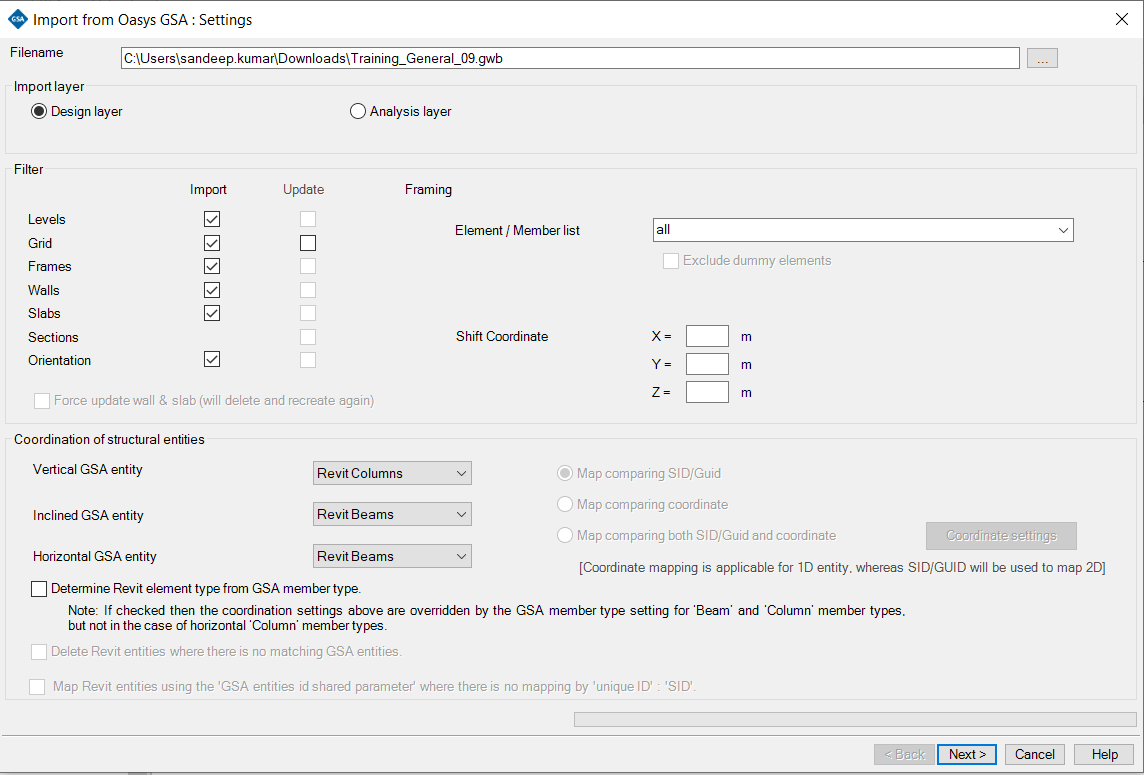
In Revit, run External tools > Import From Oasys GSA and select the following options:
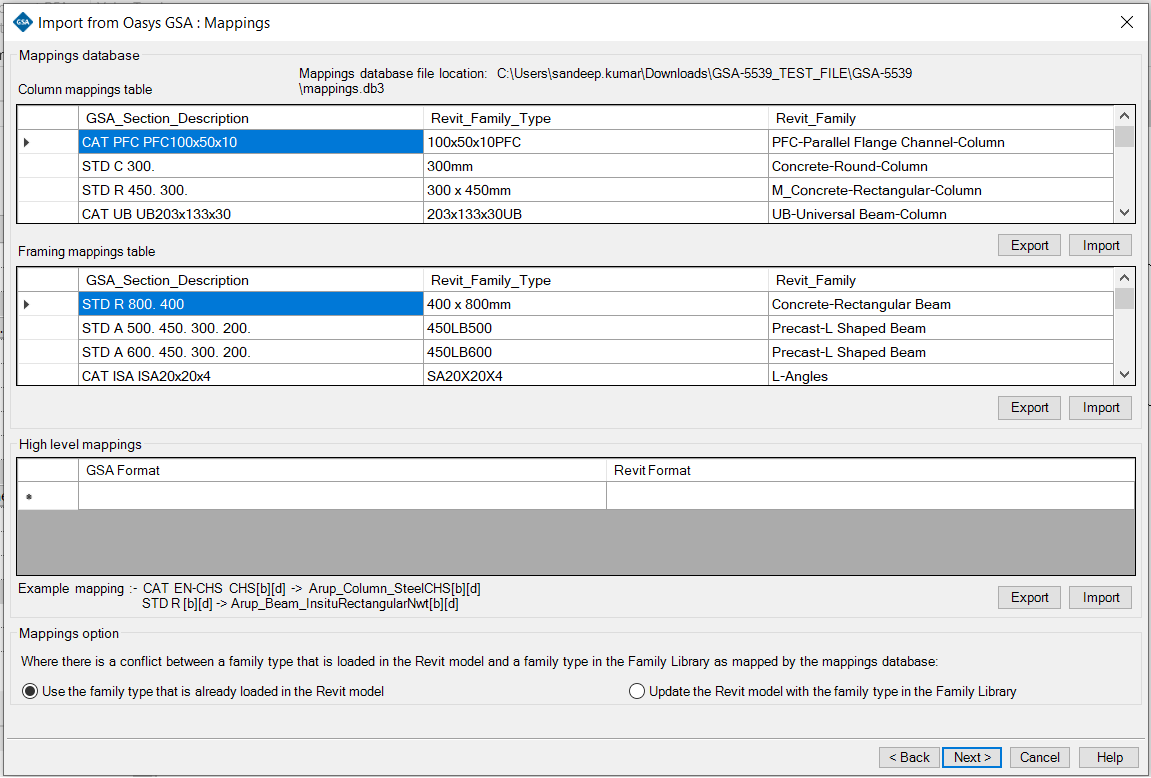
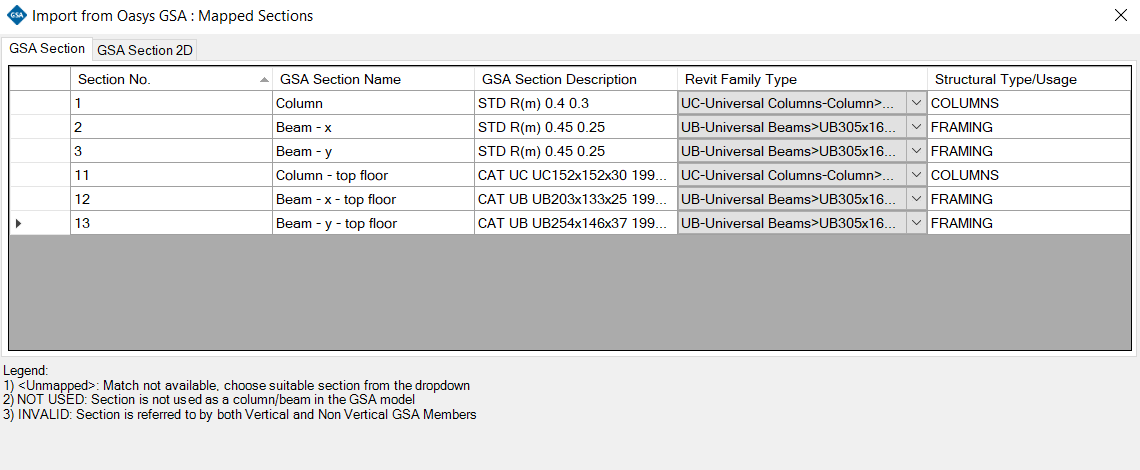
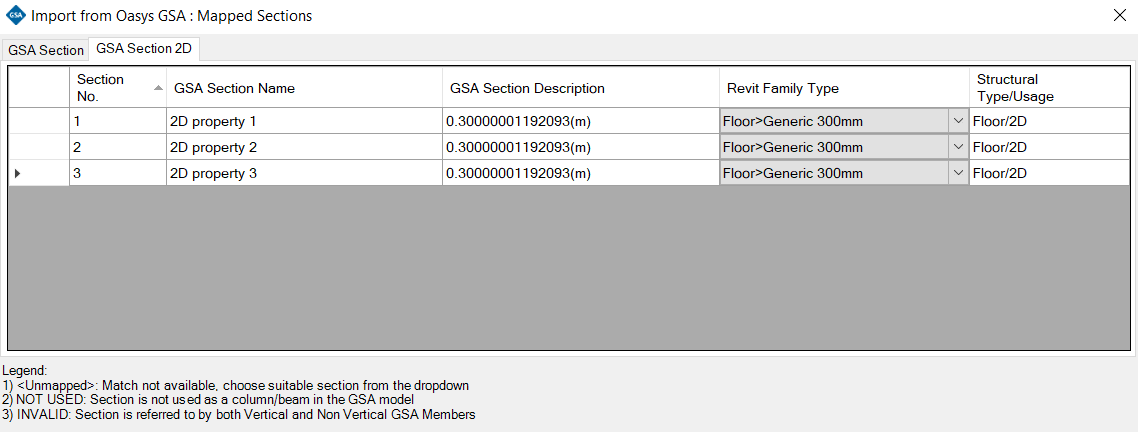
Click Next. The Import from GSA: Mappings screen will appear. Here you can view a list of mapped/unmapped GSA sections. Users can specify mapping here, then click Next to view your saved changes in the mapping database path displayed at the top of the window:
When mapping sections, make sure no sections are shown as 'Unmapped'. Sections mapped INVALID will not be imported.
- Select Unjoin elements if Revit gives a warning message.